
My top four picks are Shally’s Ladder, the two cable bridges on Thagomizer, Dynomite Sky Bridge, and Exposure Therapy’s double-helix ladder. I’ve been on the via ferrata a LOT this year, and this is the consensus favorites. Don’t take my word for it though, just go out on a busy Saturday and check for yourself.
Plan the Whole Day Around Your Feature
Reaching a feature you have in mind may take longer than you think. My goal is to educate you so you don’t end up out there without a good plan.
The usual approach begins with Sunrise Trail (STEEP! I warned you). Give your group approximately 30 to 60 minutes for that hike alone, depending on fitness, heat, and what you are carrying.
The course’s published general planning windows are 4 to 6 hours for a half-day outing and 8 to 10 hours for a full-day outing. Your chosen entrance, climbing sectors, bypasses, exit, and the people ahead of you determine what fits into that time. Adding the larger Phase 2 objectives can require a longer day.
There are 2 aspects that make much of this via ferrata a full day excursion to be aware of.
Ashley Gorge Via Ferrata is the longest in the hemisphere and some features are the most challenging on the continent.
The only way to access the via ferrata is to hike up to the rim of the gorge. This means you have to take a via ferrata down into the gorge and any exit is a via ferrata up and out of the gorge. THE FAR SIDE OF THE RIVER IS OFF LIMITS! There is no easy walk out trail at the bottom of the gorge. You may not access the road on the far side of the river or any structures in the gorge. There are currently no bathrooms in the gorge so be aware of that in your planning.
| Feature | Location | Planning your day |
|---|---|---|
| Shally’s Ladder | Beginning of The Pump, Sector 4 | You reach it after the approach and initial route access. Include time to continue through or exit The Pump using designated connections. |
| Thagomizer cable bridges | Sector 5, between The Pump and The Soup | On the main route, you have already completed The Pump. Allow time for the rest of Thagomizer and your chosen exit. |
| Dynomite Sky Bridge | The Soup, Sector 6, before T-Rex Terrace | Expect hours of travel on the main route. Build a full-day plan that includes getting back out. |
| Exposure Therapy | Sector 12, high on Jur-Ass-Kicked | A substantial climbing objective reached after a long approach and ascent. Give it a dedicated full-day plan. |
Allow time for the approach, queues, breaks, and your exit. Check the current route map and closures before choosing your itinerary.
Use these locations to choose your priorities with the route map. A shorter outing needs its own suitable itinerary, and the full-day estimate does not promise that you can complete all four features.
1. Shally’s Ladder: The Opening Challenge on The Pump
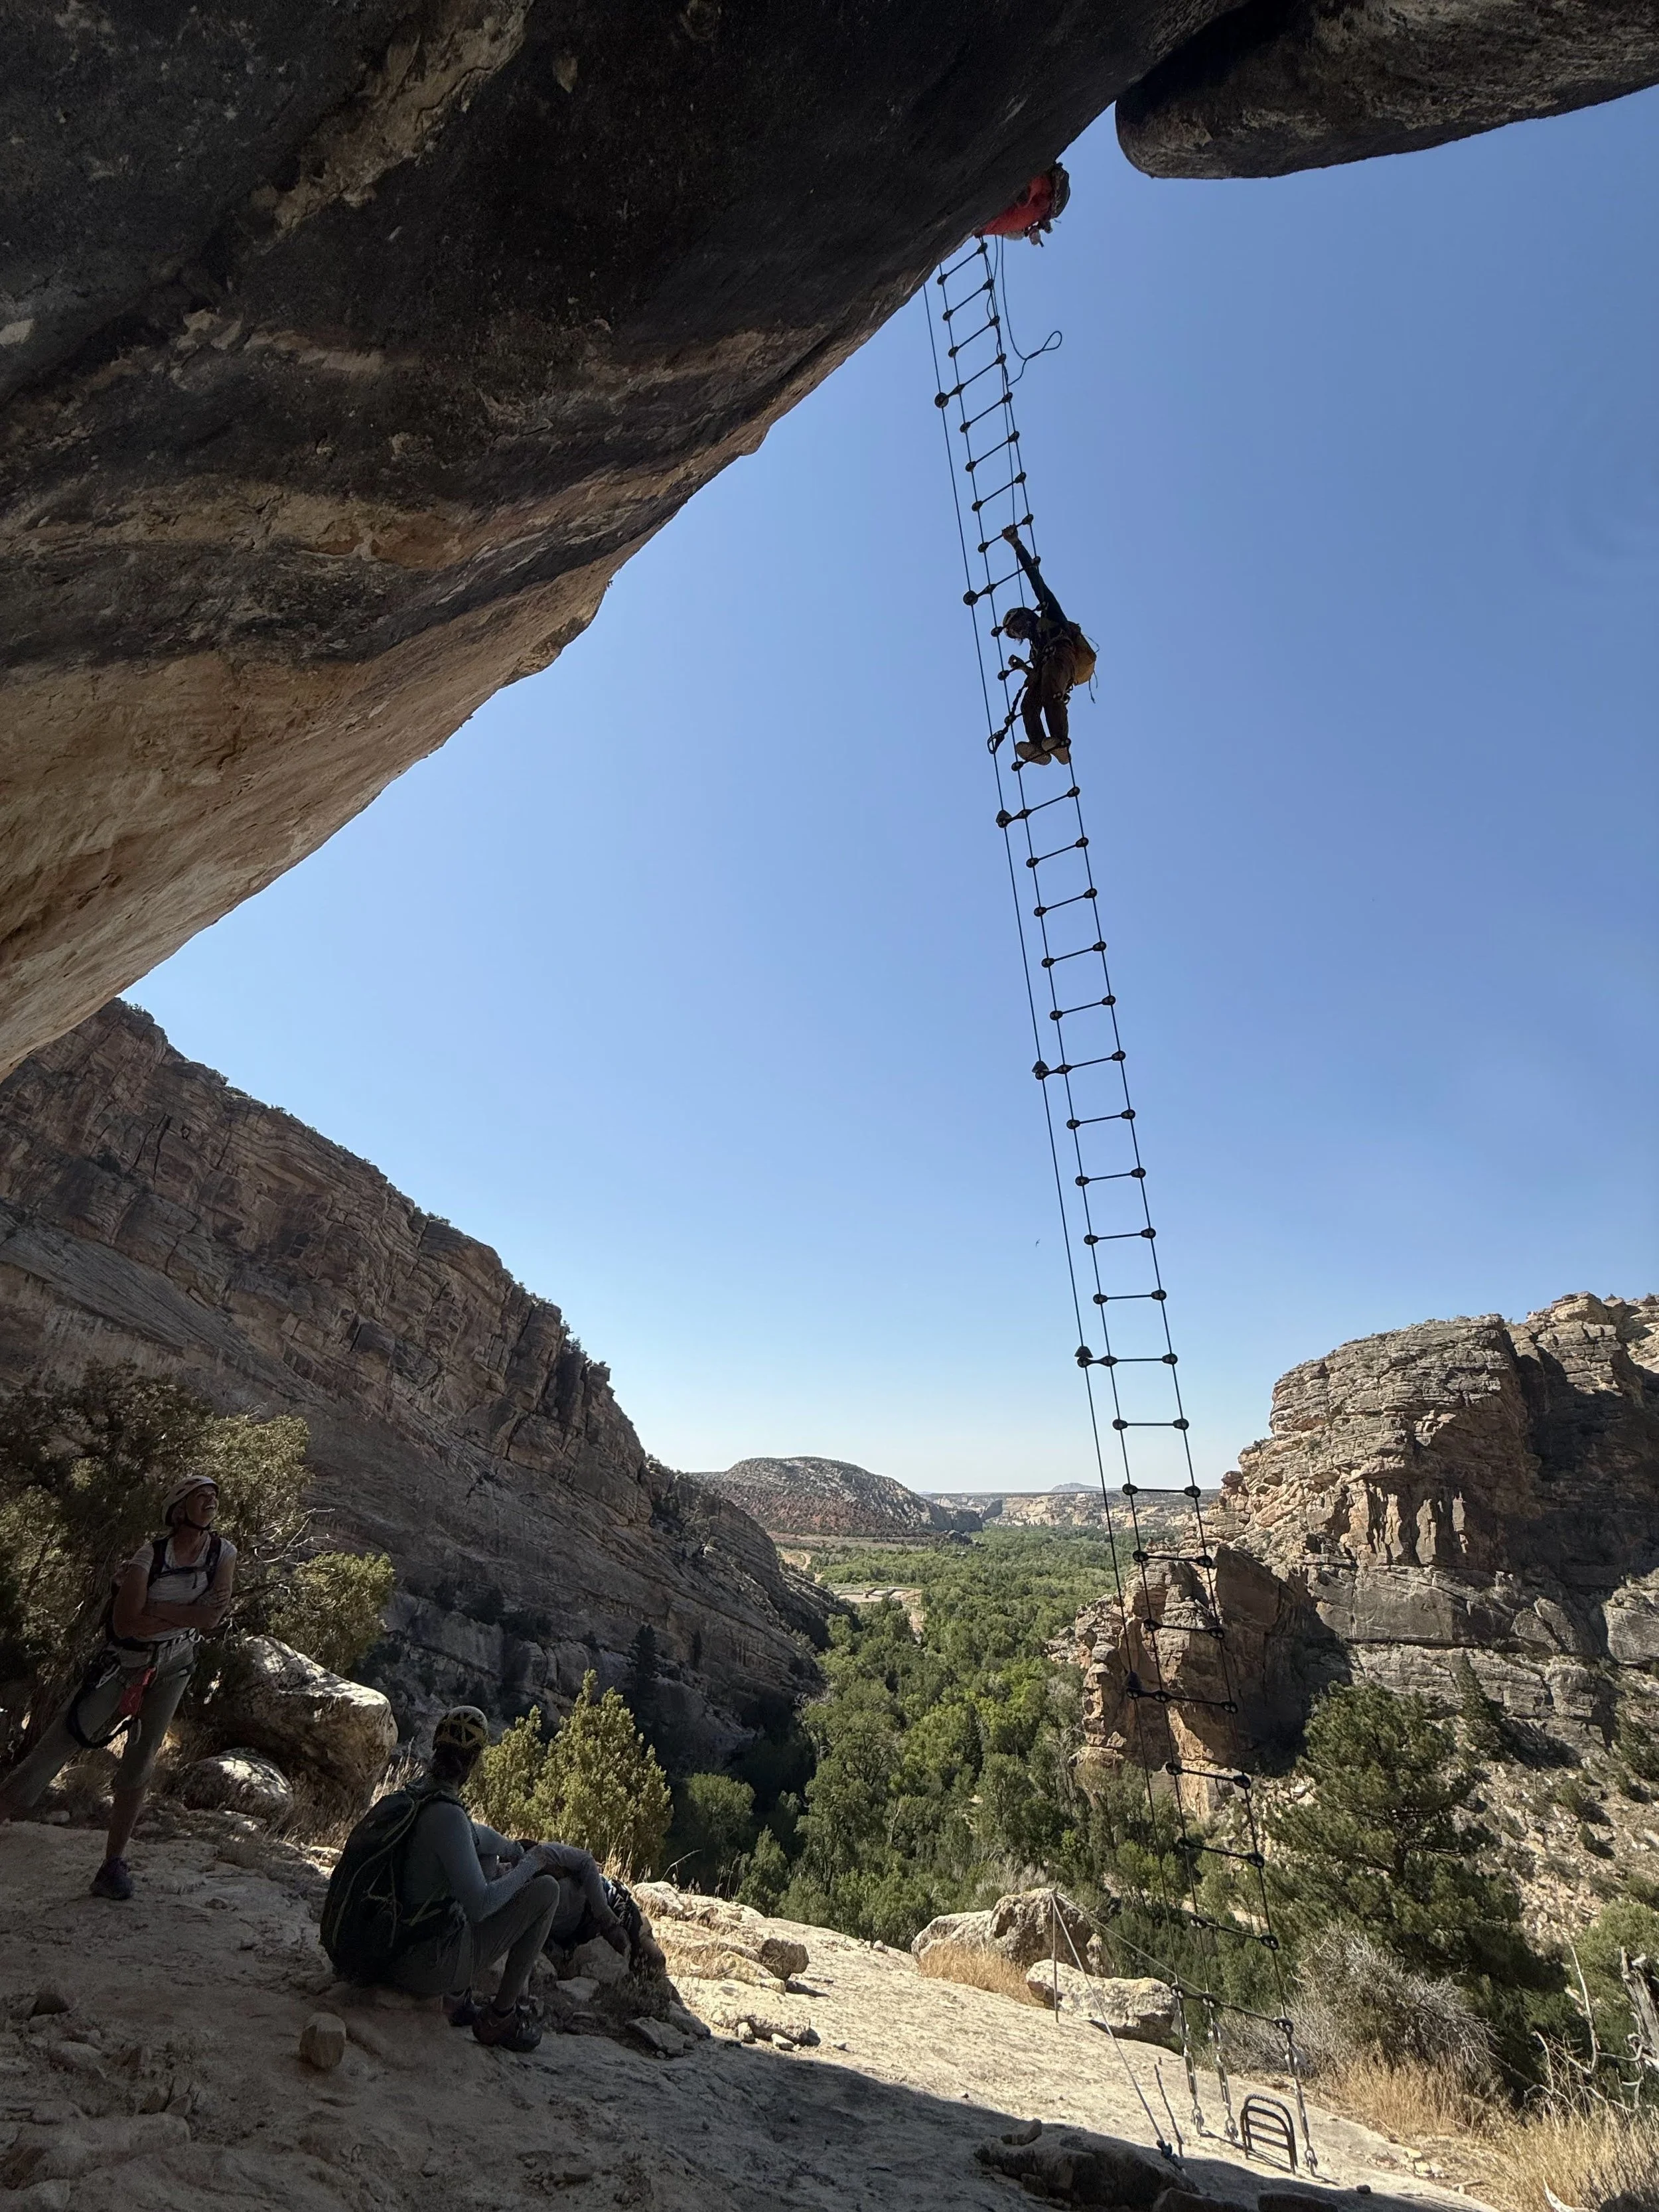
Where it is: Shally’s Ladder starts The Pump, Sector 4. It comes before the Bad Grammar area and its route variations. The Pump travels in one direction, so decide whether the group is ready before entering.
Why It Is a Standout
Shally’s Ladder gives you an early taste of the combination that makes via ferrata memorable: fixed climbing features, open space beneath you, and the need to keep moving and manage your equipment.
This is the first standout feature on the course. You may see it from the top of the gorge if you look hard enough. It is an incredible ladder that gets you up onto the canyon walls.
It also makes a strong photo. That makes it worth remembering that the people behind you are waiting to climb it, too.
Crowds, Exposure, and Concerns
The beginning of the first demanding sector can become a bottleneck. People may need time to find their rhythm, transfer their carabiners, or settle their nerves. On saturday’s expect to see a line here. If you want to skip the line there is a short ladder further down you can walk to. There are also trails up above to consider.
Give the climber ahead room. Keep photos brief when others are waiting, and make your route decision before entering the ladder.
The concern is the combination of height, climbing effort, and what comes next. Finishing the ladder is the easy part. Behind it is demanding terrain. At the next intersection there is the first bailout that goes up and out. From there you can go to an exit or skip the hardest sections of the pump.
The Above the Pump Trail and Little Foot Ladder Trail offer designated alternatives that bypass the opening features. Review those options before committing.
How Much Time Should You Allow?
The approach hike is only the first part of reaching Shally’s Ladder. You still need to enter the gorge and travel to The Pump.
For a day centered on this feature, you can expect 3-5 hours from start to reaching the parking lot at the end. Leave room for delays at the ladder, There will be a line most Saturdays for a large part of the day.
2. Thagomizer’s Cable Bridges: A Single Cable Underfoot
Where they are: Thagomizer, Sector 5, connects The Pump with The Soup. Its two cable bridges sit within a challenging sector that also includes exposed rock edges and a chimney finish.
Why They Are Standouts
These crossings make a simple movement feel completely different. You are walking across a gap, but your footing is a narrow steel cable.
That small walking surface, the open space below, and movement in the crossing make the bridges a memorable balance challenge. They also offer a different experience from a bridge with a full walking deck.
Crowds, Exposure, and Concerns
A cautious crossing takes time. Two bridges within a demanding sector create multiple places where a group may slow down. Inexperienced climbers and people scared of hikes should strongly consider skipping this route. Skipping this and continuing on is easy here.
Foot placement, comfort with exposure, and your ability to handle equipment while balancing all matter. Follow the posted crossing limits and spacing instructions. Let the person ahead progress far enough before you enter.
Thagomizer is a one way, with access/exit climbs at its ends. The TSP Connector, T7, provides a hiking alternative for groups bypassing the sector. Choose that alternative at the appropriate junction.
How Much Time Should You Allow?
Following the main sequence, you reach Thagomizer after The Pump. It takes an average of 5-7 hours (expect the longer end of that estimate on a Saturday) from start to finishing at the parking lot.
Your schedule needs to cover reaching the bridges, finishing the sector, and returning by your planned exit. Crowds at either crossing can push that schedule back.
3. Dynomite Sky Bridge: The Crossing Before T-Rex Terrace
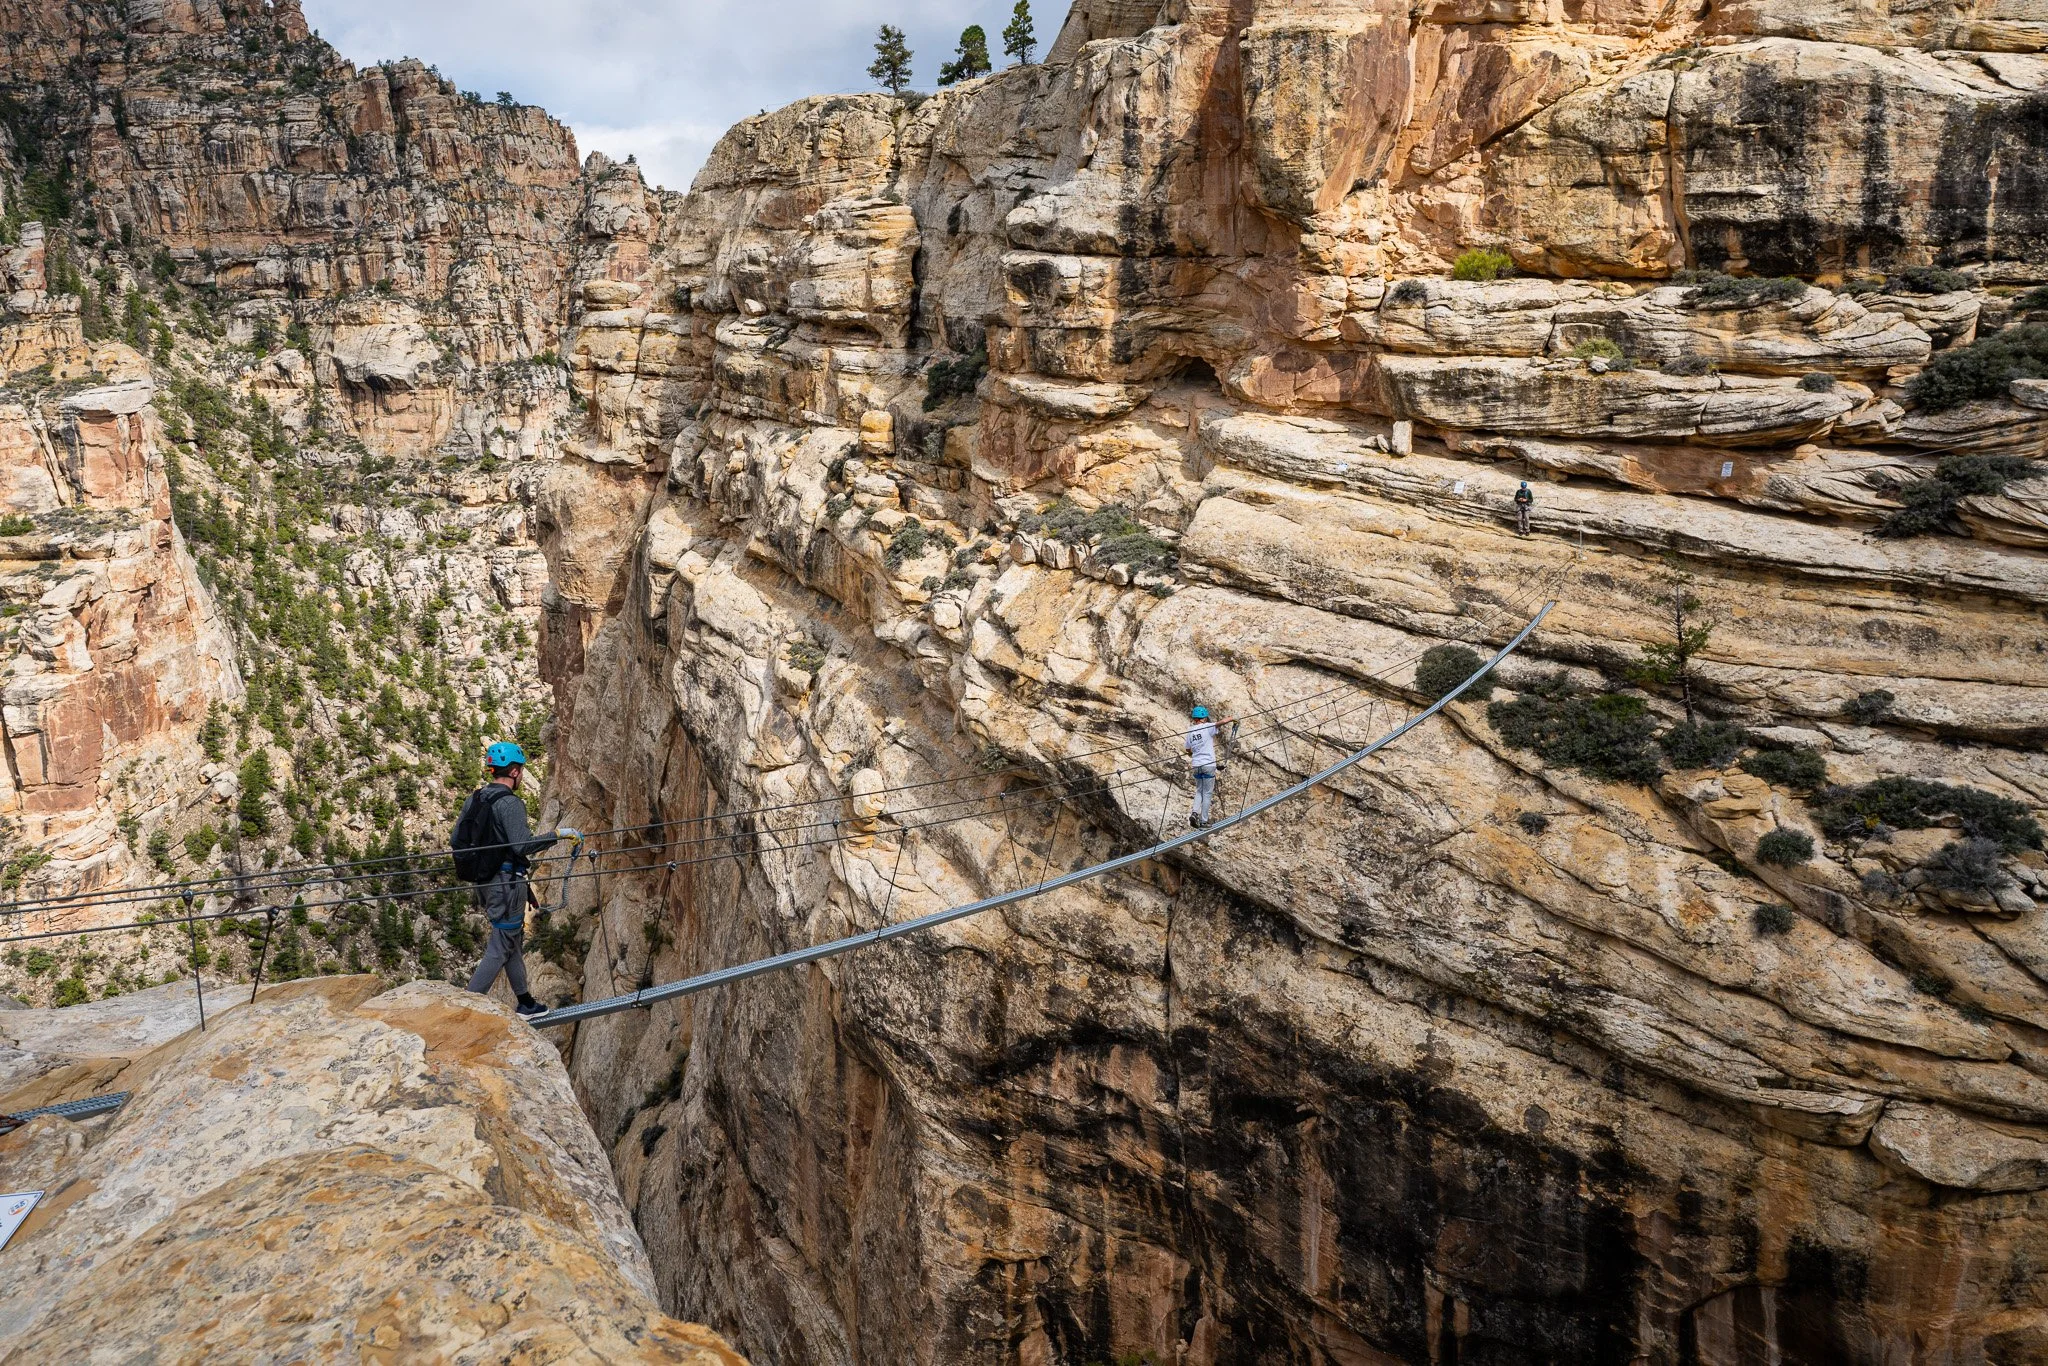
Where it is: Dynomite Sky Bridge is in The Soup, Sector 6, before the route continues toward T-Rex Terrace.
Why It Is a Standout
The bridge combines a suspended crossing with the scale of Ashley Gorge around you. It is an obvious photo opportunity and one of the route’s most recognizable features.
It can also appeal to people who find the single-foot-cable crossings intimidating. A walking deck gives you a different footing experience, although you are still crossing an exposed feature.
Crowds, Exposure, and Concerns
Photo stops and hesitant crossings can slow traffic. Have your camera ready before you reach a suitable photo spot, keep the route moving, and follow the bridge’s posted occupancy limits.
A decked bridge can still move beneath you. Wind, exposure, and fatigue may affect how comfortable the crossing feels. Stay connected to the designated safety cable and follow the route instructions.
The Soup is generally less physically demanding than The Pump, but it is farther into the gorge. People often arrive after considerable hiking and climbing. Crossing the bridge still leaves the return journey.
How Much Time Should You Allow?
On the main route, reaching Dynomite Sky Bridge takes hours. Plan a full day around the complete itinerary and allow extra time for queues, breaks, and the exit. Expect 6-8 hours to do this route and to take an exit back out to the parking lot.
4. Exposure Therapy: The Double-Helix Ladder on Jur-Ass-Kicked
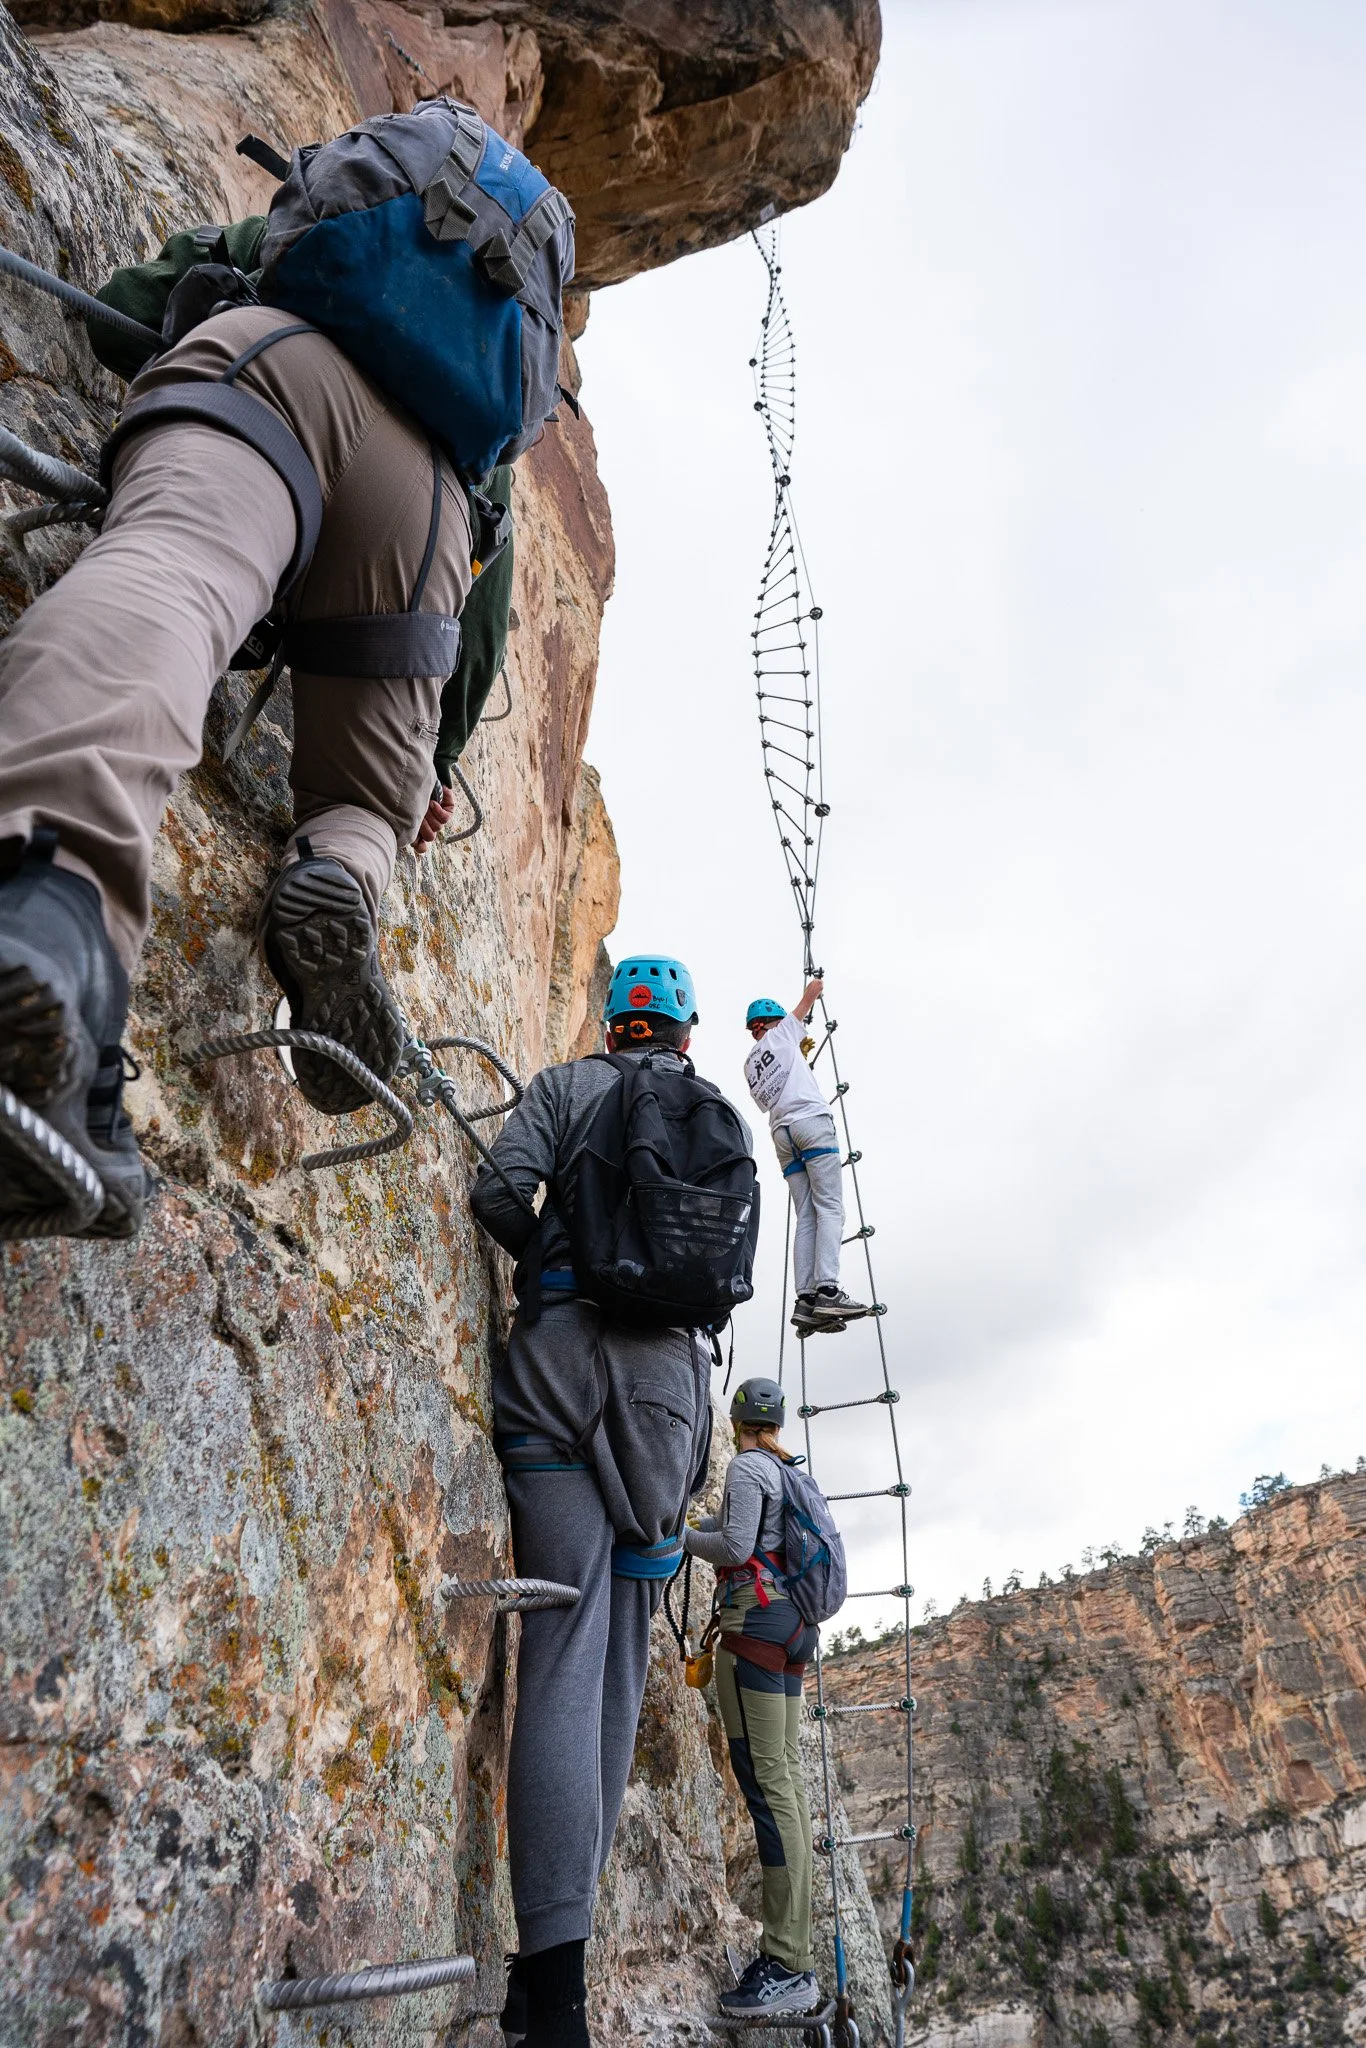
Where it is: Exposure Therapy, Sector 12, is high on Jur-Ass-Kicked. The long ladder is Exposure Therapy; Space Man is the optional roof finish above it.
Why It Is a Standout
The twisting ladder, overhanging position, and open canyon beneath it create one of the most dramatic climbing experiences in the gorge.
The ladder is approximately 75 feet long and sits over 700 feet above the canyon floor. It is the most breathtaking (in more ways than one) features in the world, much less the via ferrata. We have had many clients tell us Jur-Ass-Kicked is more incredible than Angels Landing.
Crowds, Exposure, and Concerns
This feature demands more than enthusiasm for heights.
By the time you reach it, you have already completed substantial climbing. Tired arms, increasing exposure, and a wait below the ladder can make the final challenge harder. Wind and limited daylight also matter. This is a very physically demanding route. This is not for inexperienced climbers.
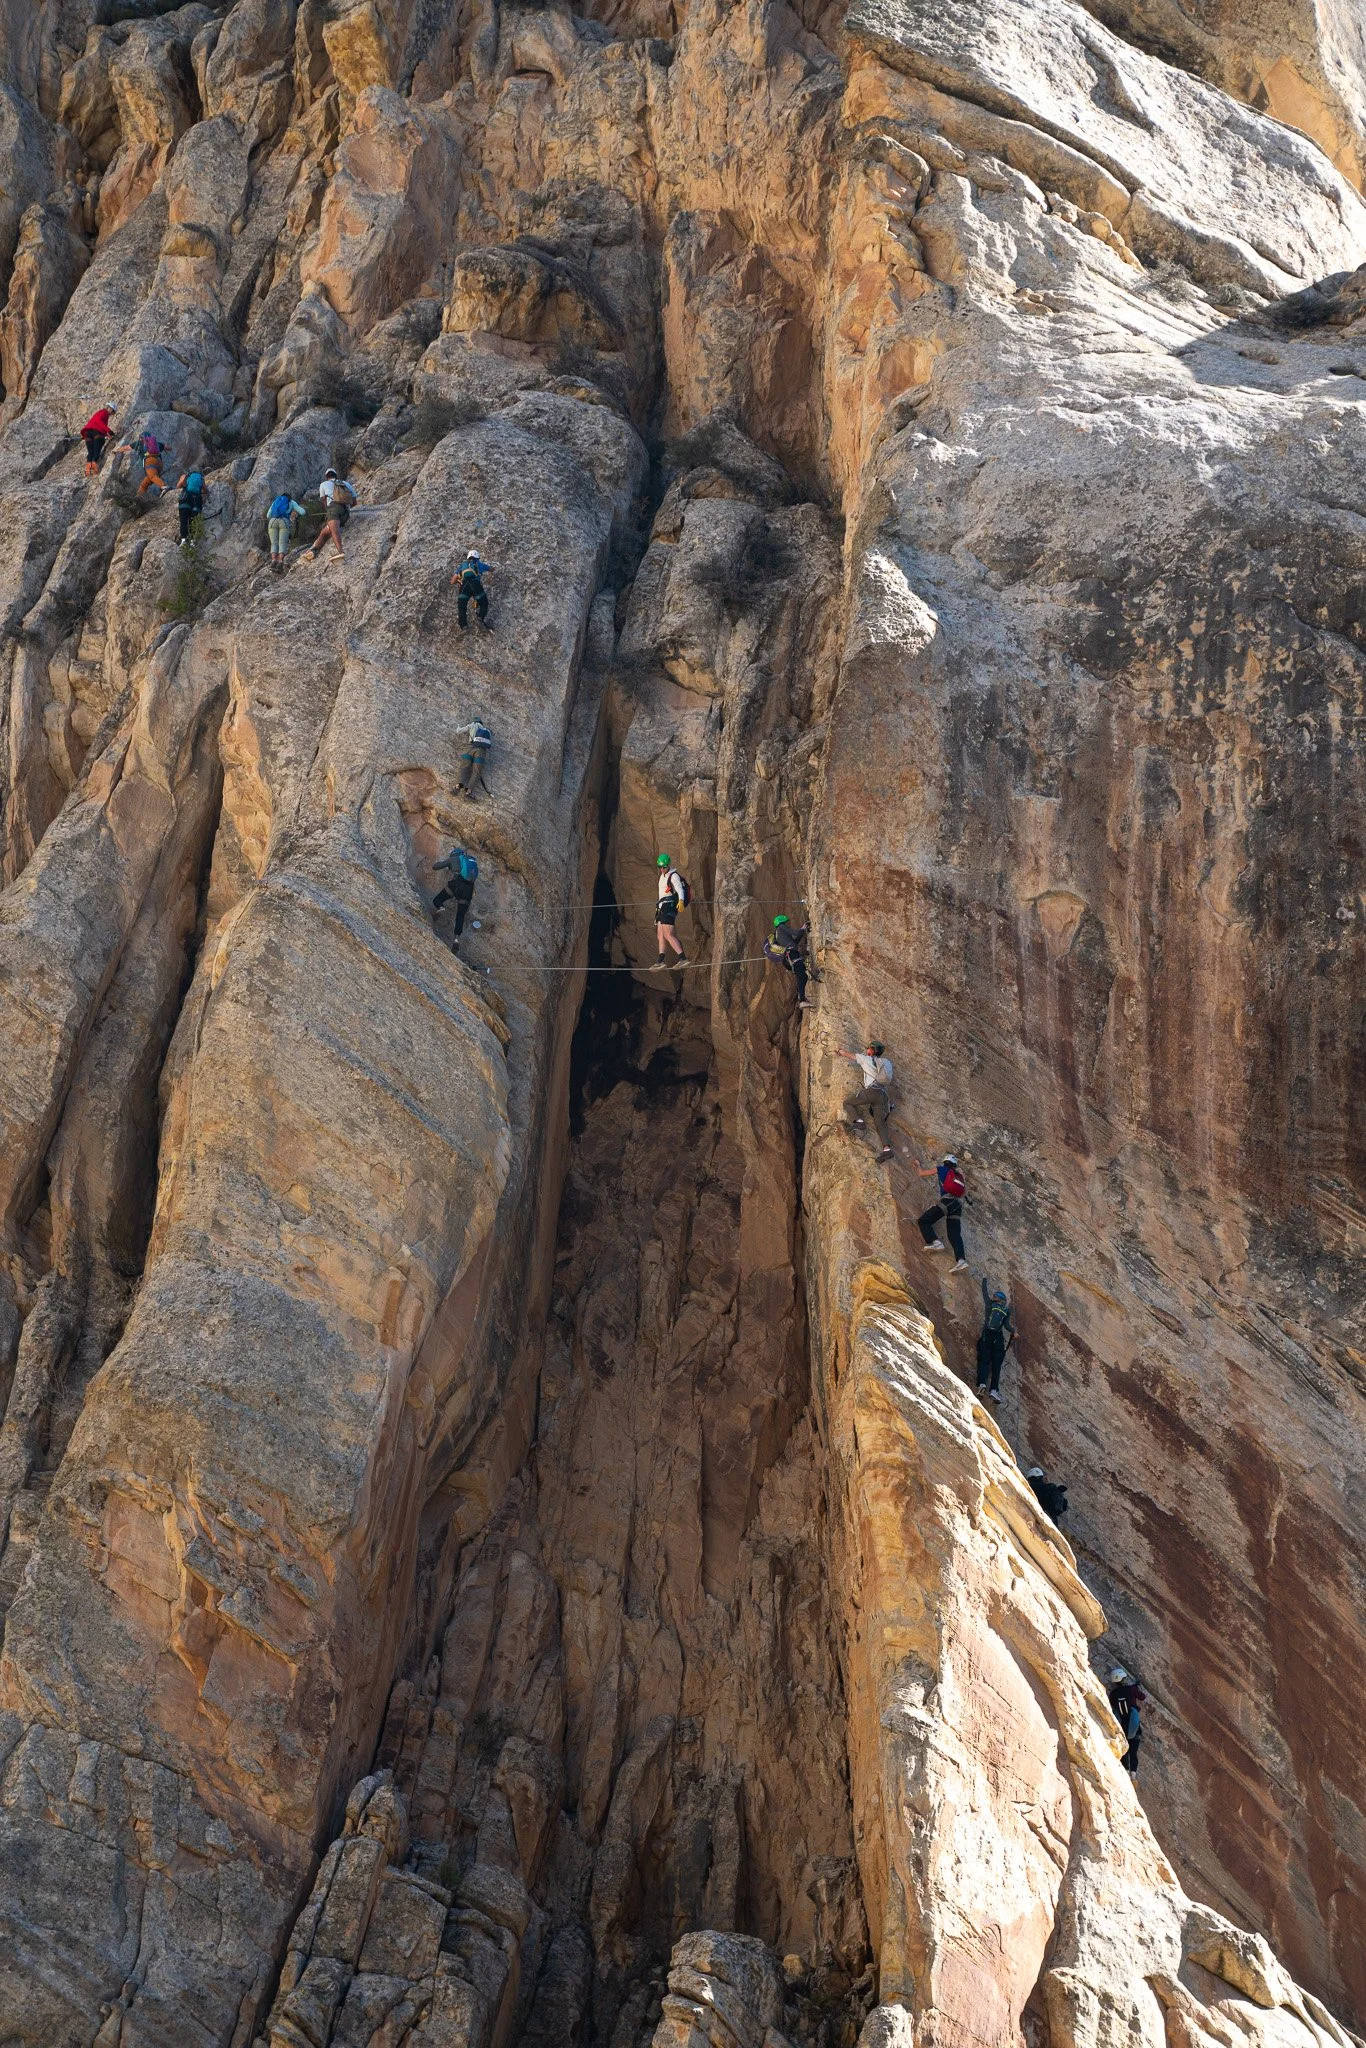
On Saturday’s, lines here are long and slow moving. Many climbers bite off more than they can chew here and may get stuck on the ladder. Or someone may want to have a solo photoshoot here. Please don’t do that, please share the joy of experiencing this incredible feature by being considerate of your fellow climbers.
Jur-Ass-Kicked is a very difficult, committing sector. Its climbing direction is one way, and retreat becomes more complicated as you climb. An alternative near Exposure Therapy should not be assumed to provide an easy finish.
IF YOUR GROUP IS UNSURE, PLEASE DO NOT RISK YOUR LIFE TO DO IT!
How Much Time Should You Allow?
Give this objective a dedicated full-day plan developed around your group’s experience and the selected approach. This is easily a 7-10 hour day.
You can cut this time much shorter but only if you are willing to skip 90% of the Via ferrata. Even then, this will not be a quick in and out excursion. Skipping the large majority for the Jur-ass-kicked wall will still easily take 3-5 hours.
Combining it with The Pump, Thagomizer, and The Soup adds substantial travel and climbing. That combination can exceed the course’s general full-day planning window. Discuss your priorities before entering the gorge and keep a realistic margin for the summit and return hike.
Limits and Etiquette Apply to Every Feature
Check the County’s current participation rules and your equipment’s limits before climbing. Published course requirements include a 90 to 265 pound weight range and a minimum reach of 62 inches. Your lanyard’s own limits also apply, including how carried equipment is counted. Participants outside the weight range need to discuss professional guiding and supplemental protection before booking.
On the route, follow posted direction, occupancy, and closure signs. Keep the required spacing between climbers. Guidance calls for two person per safety-cable segment between anchors; a bridge or ladder have specified limits.
A queue is a reason to allow more time, take a designated alternative when available, or shorten your plan at a suitable decision point. Keep the person ahead free to move at a pace they can manage.
Choose Your Priorities With Dyno Outfitters
Tell us which feature caught your attention and who is coming with you. We can help you understand the route connections, discuss current conditions, and choose an outing that fits the group.
Reserve via ferrata gear or explore guided trips before your visit.